Step 1 - Navigate to the Projects tab
Step 2 - Select the New Project button. 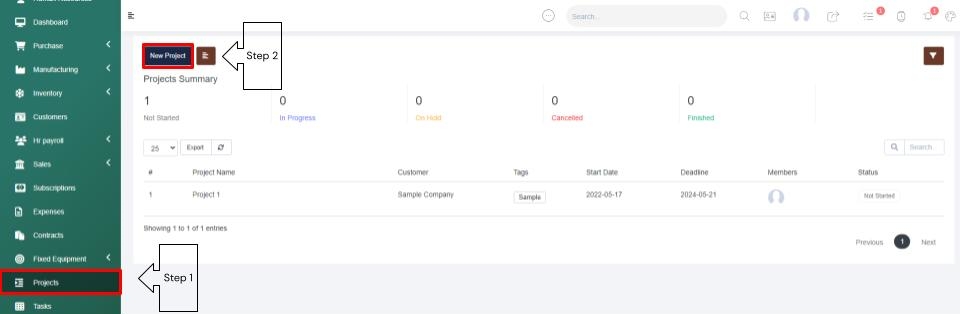
Step 3 - Populate the details- Give your project a name and enter your customers company name. Then you have the option to leave calculate progress through tasks selected, or you can unselect this option to manually manage your progress percentage. Then in the Billing Type dropdown, select a billing type (Fixed Rate, Project Hours, or Task Hours - based on a task hourly rate). Then select the project status, and enter the rate per hour if you chose Task hours as the billing type. Then you can enter in the projects estimated hours, and select the Members drop down to add in staff members. Then choose a start date. The deadline date is optional. Then you can tag the project as you see fit, enter in a project description, then choose to check or leave unchecked the Send Project Created Email option. 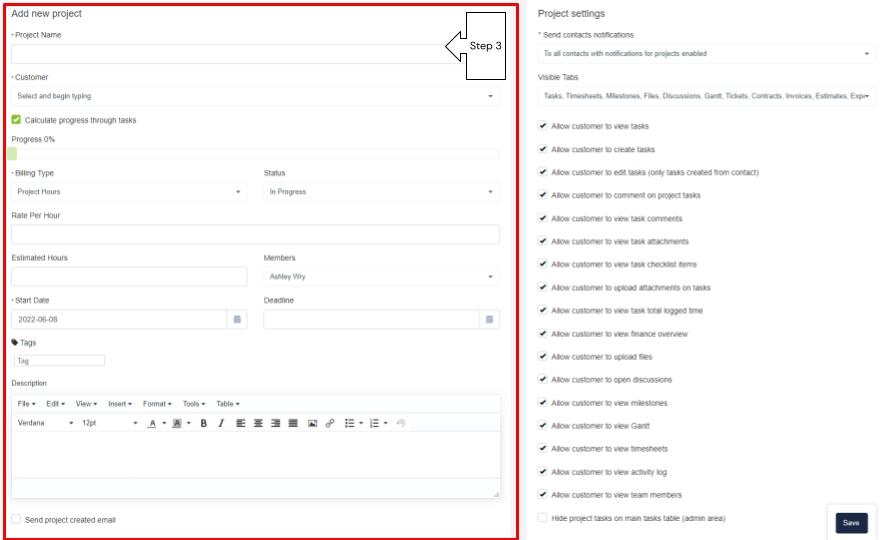
Step 4 - FIll in the Project Settings - located to the right of the New Project information you just added, is the Project Settings. First you can manage your project notification settings (Send to all contacts, Specific Contacts, or Do Not Send Notifications). Next you can select the Visible Tabs you will see within your project. Then you will manage the settings for your customers within their client portal
Step 5 - Save your Setup. Once saved you will be taken into your project where you can click through the tabs, set up project milestones, assign tasks, and manage all of your project related information. 
As Projects can be accessed by clients, if desired within the client portal, it is important you read through each of these settings to control what your customer will have access to. Then you can save your project set up and you will be taken into your new project.
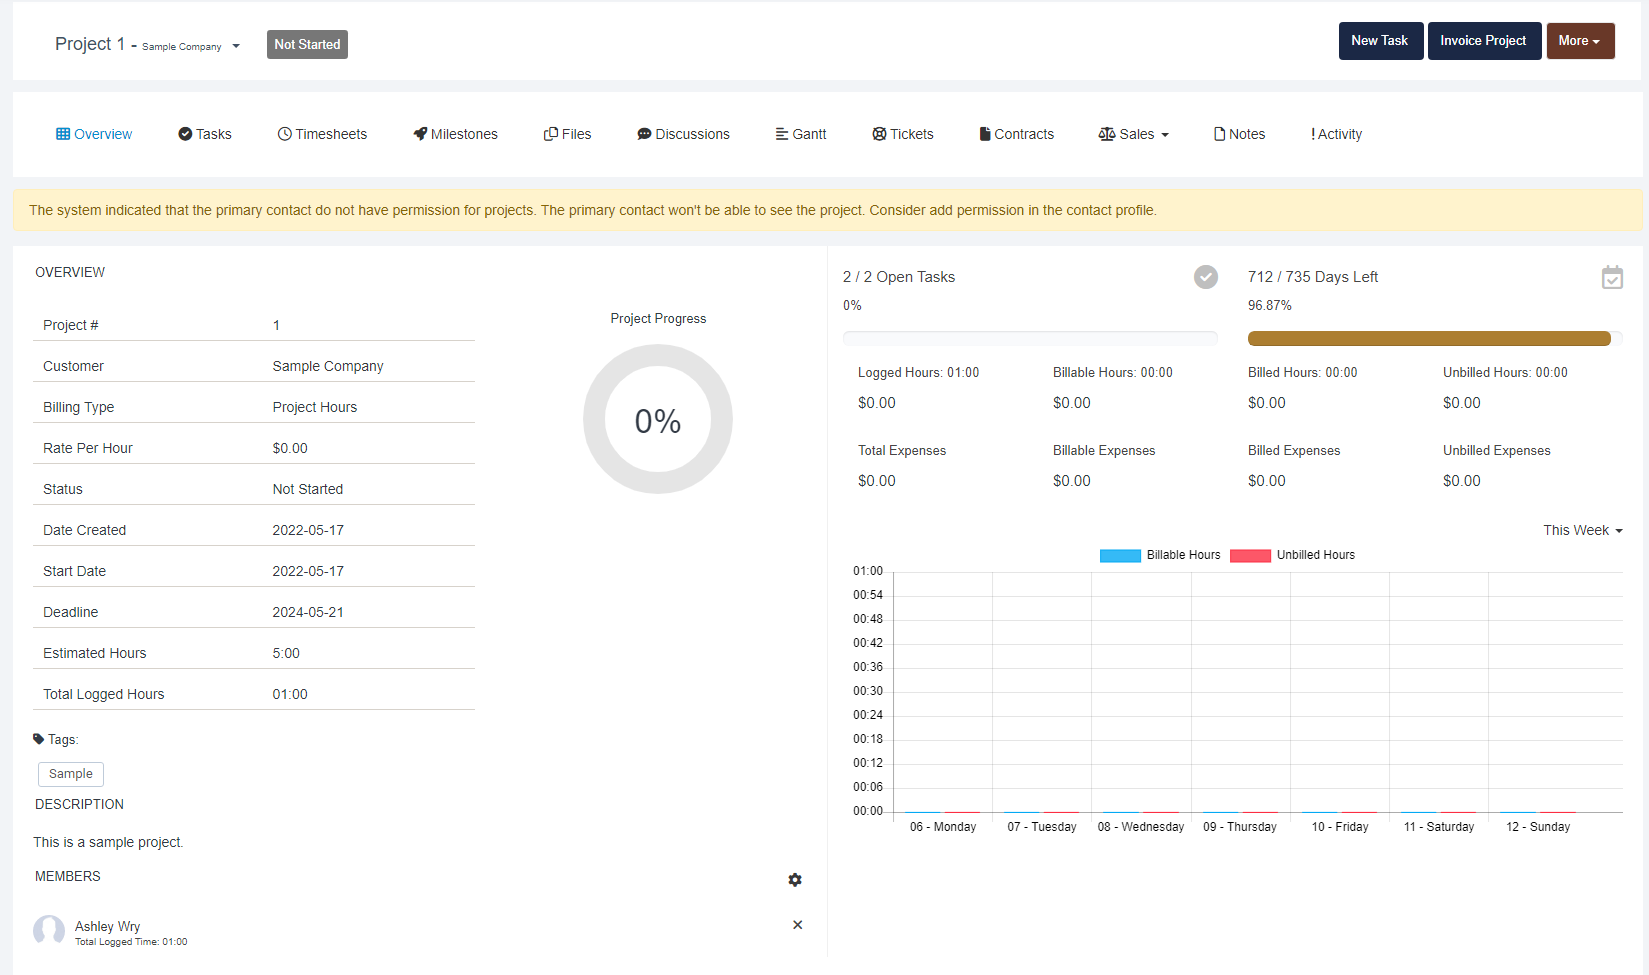
Within this project you will have all of the visible tabs you selected. On the Overview tab you will see a summary of the project details, then you can easily add in milestones and tasks, manage contract details, collaborate with your clients using the discussions tab, manage project files, manage internal notes, manage timesheets, and easily access the activity log to understand all that has gone into a project.