To watch our training videos on how to manage your Sales within your Enzebra, check out our training videos and course resources here > Core Platform Management | Enzebra (enzebralabs.com).
Once you navigate to this link you will have to register as a user on our platform and select the Enroll Now button to enroll yourself in our FREE training on the Enzebra Core Platform. Once enrolled and registered as a user you can select the Core Platform Management course and select Go To Program to access all of the training available to you!
If you prefer to read about the Sales Management section, the following is a summary of the Sales tab features: 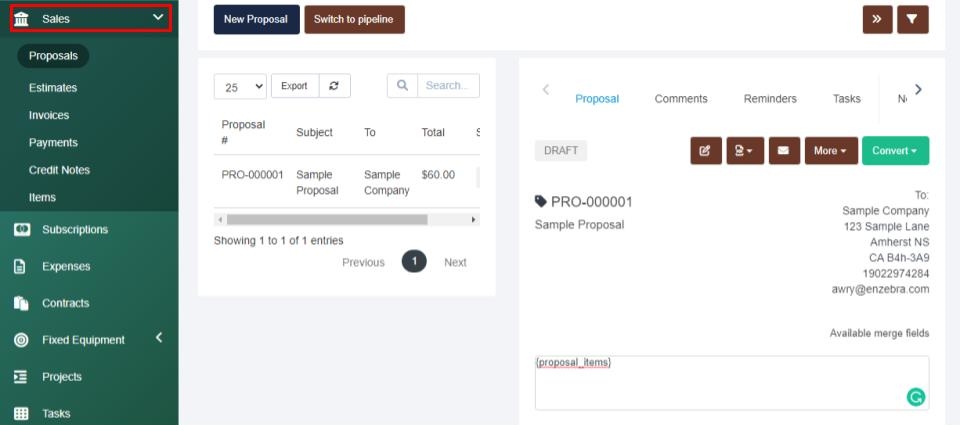
To manage your sales proposals, estimates, invoices, payments, credit notes, and items navigate to the Sales tab located on your left navigation menu.
Sales Items
Within the Sales Items tab, you can enter, edit, and manage the products your company offers. On the summary screen, you will see the product description, long description, rate, tax rates, and group it is associated with.
The Groups button near the top when clicked allows you to view existing group names, export a group list, or add in a new group name by typing in the name and selecting New Group.
The Import Items button will take you to the import screen where you can download the import sample, upload your desired file, and then select Import. Credit Notes > If at any time you wish to create a credit note, you can create new notes through the Sales > Credit Notes tab. From there you can select the New Credit Note button.
From there you can enter in the company name the credit note will be associated with, select the Add Item drop-down to enter which items are receiving the credit note and add each line item by selecting the checkmark.
Next, you can apply any applicable discounts by selecting the discount type and entering the discount amount as a percentage or a fixed amount.
Then you can enter in a reference number if desired, leave any admin notes, and Save or Save & Send the details to the appropriate parties.
Payments
The payments tab allows you to see all of your payments on one summary page. Here you can search through the data using the search engine or export the data at any time. The proposals, estimates, and invoices tabs all connect together to allow sales proposals and estimates to be easily converted into an invoice. Within each of these tabs, you can select the toggle icon which appears as two side-by-side arrows to easily review the desired content by selecting the document name. When viewing the information this way, you can leave comments, set reminders, create tasks, leave internal notes, or review templates. You can also edit, view the documents as a PDF, attach files, copy the document, or select the Convert button to easily convert the document to an invoice, proposal, or estimate.
Proposals
This tab allows you to view and manage your proposals. If desired, you can switch between the list view and the pipeline view. Here you can view, edit, or delete proposals.
To create a proposal select New Proposal. Then you will have to fill out the subject, select if the proposal is related to a customer or a lead, then select the associated lead or customer. Once selected the to and address information will populate with the details you have on file.
Then you can manage the proposal date, and select the date the proposal is open until. Next, you can select the currency, the discount type if applicable, enter in any tags as desired, select the status, and select to who the proposal will be assigned.
Then you will select the Add Item drop-down to add a product to the proposal. After you select an item you will have to hit the checkmark at the end of the line item to add this to the proposal. After all of your items are entered, you can note the discount amount as a percentage or fixed amount. Then you can enter in any required adjustment amounts. Then you will see the subtotal, discount amount, adjustment amount, and total cost of the proposal. From there you will Save or Save & Send the information.
Converting Proposals > After saving a created proposal, the option to Convert becomes available to transfer the document straight to an invoice or estimate when you toggle to view the proposal details.
Estimates
Similar to the proposals tab, the toggle function can be clicked to view your estimates in separate views - you also have the ability to associate it with a customer, tag it for easy search access, and assign a sales agent.
To create a new estimate, select Create New Estimate. Then you will have to select the customer the estimate will be associated with. After selecting the bill to information will populate with the details you have on file and the option to associate the estimate with a project will appear. The estimate number will automatically fill as the next available number. The tag function allows you to tag the estimate to easily filter through your estimate list and the status is changeable to meet your needs.
Then you can enter in a reference number if desired, assign a sales agent, select a discount type if applicable, and enter in any admin notes as applicable. Then you can select the Add Item drop-down and select the desired item.
This will appear below as a line item, then you can edit the details as you see fit, then hit the checkmark at the end of the line to add the line item to the estimate. If desired you can show the item with a quantity, hours, or a combination of quantity or hours.
Once you have all of your line items added you will see the estimate subtotal, then you can enter in the discount amount as a percentage or fixed amount, and add any adjustments, then you will see the total for the estimate.
At the bottom, you can add in any client notes and note any terms & conditions. Then you can Save or hit the arrow beside save to Save & Send or Save & Send Later
Converting Estimates > After saving an estimate, the option to Convert becomes available to transfer the document straight to an invoice or proposal when you toggle to view the estimate details from the estimate summary page.
Invoices
Within the Invoices tab, there are options to view or edit an invoice. When you hit the toggle button, you can view it as a PDF, send it via email, or you can record a payment for an invoice with the green “+Payment” button. You can also see emails tracking history or the views tracking history or select the More button to view the invoice as a customer, manage inventory delivery vouchers, create a credit note, attach a file, copy the invoice, or mark the invoice as sent, cancelled, or pause overdue reminders from being sent.
Within the invoices tab, you can create an invoice, manage recurring invoices, or manage batch payments.
Creating Invoices > To create an invoice select the Create New Invoice button. First, you will have to select the Customer by entering the company name the invoice is associated with. Once selected the bill and ship to information will automatically fill in with the data you have on file.
In the event the customer has invoices available for merging, the system will show a notification on top of the screen where you can select the invoice and select whether you would like to mark the merged invoices as cancelled instead of deleting them.
After you have the customer details selected, the invoice number will auto-fill as the next available, the invoice date will fill as today's date unless you manually change it, and then you can set the invoice due date. Below this, you can choose to select the “Prevent sending overdue reminders for this invoice” if desired. Then you can tag the invoice as you see fit, select the allowed payment modes for the invoice, assign a sales agent, select if the invoice is a recurring invoice, and select the discount type if applicable. Then you can leave any admin notes, and select the Add Item drop-down menu to select the items you would like to add. You will have to add each line item to the invoice by selecting the checkmark at the end of the line.
Then you can manually enter in any discount values as a percentage or fixed amount, then enter in any adjustments and review the invoice subtotal and total. Once filled out you can leave any client notes and enter in your terms and conditions. From there you can save the invoice as a draft, save, or select the arrow beside save to save & send, save & send later, or save & record a payment.
Recurring Invoices > This button will take you to a summary page of all of the recurring invoices set up within your system.
Batch Payments > By selecting the Batch Payments button you will be taken into an Add payments screen where you can filter your systems invoices by the customer then record multiple payments with ease by selecting the payment mode, giving the transaction a unique ID, then noting the amount received and then selecting Apply to record the batch payments.
If desired within this screen you can select the “Do not send invoice payment recorded email to customer contacts”.
If you have any questions about the Sales section, navigate to the Enzebra Core - FAQs to search for answers to your questions with ease.