Located within your left navigation pane is a section called Manufacturing. This section allows you to streamline your production processes and eliminate guesswork for your employees. When selected you will see the following tabs: Dashboard, Products, Product Variants, Bill of Materials, Routings, Work Centers, Manufacturing Orders, Work Orders, and Settings. We handle the setup of this section for you so you will only have to learn about the other sections!
Dashboard > On your dashboard you will see charts about your Manufacturing and Work Orders. You will also be able to see a summary of your Work Centres and what is set to launch, what is in progress, and what is late. You can filter your charts by Measures or a Period in Time. If at any time you would like to view your chart in full screen, print the chart, or download the chart image, you can select the 3-line icon beside the chart title to access these options. 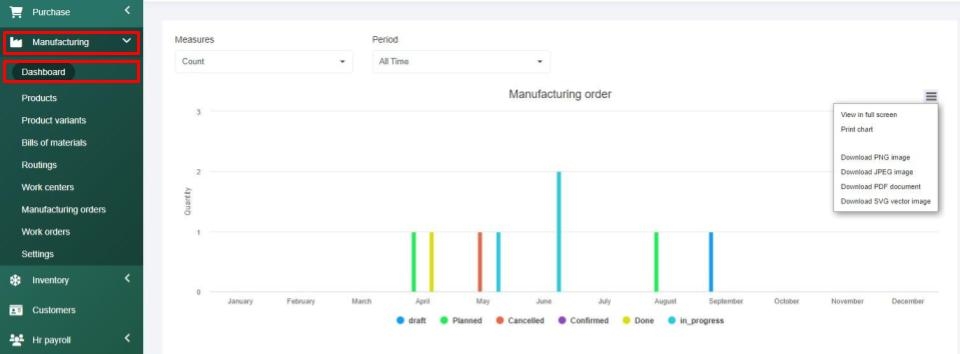
Products > This section allows for optimal product management as it contains all the products you use in production. On this screen, you can filter your information by product, product type, or product category. You can also select products to export their data or conduct bulk actions to mass delete products by selecting the desired product(s) and selecting Bulk Action, then selecting Mass Delete, and Confirm. Within this section, there is also the option to print barcodes by selecting Barcode Printing and then selecting all products or select items. Within the select items drop down you can select all, deselect all, or select as many products as desired. Once you have all your items selected you can hit confirm and a PDF will open containing your barcodes to print.
To add a product, simply click the Add button and from there you can populate the General Information. It is important to select whether this product can be sold, can be purchased, or can be used in manufacturing. You can leave all three options selected or unselect the options that are not relevant.
Then you can enter into the Variants tab where you can enter in any product variations. Within the Variation tab, you can sort the information using commas for example: red, yellow,blue. For each comma, a product variant will be created. Then you can manage your Purchase information, then navigate to the Inventory tab to manage your operations and logistics in association with the product. Make sure you hit Save on each tab before exiting to the next!
Product Variants > In the event you add in product variants when adding a new product, you will see a summary of the product variants within the product variants tab. Within this tab, you can also filter the information by product, product type, or product category. You can also export the data at any time, conduct bulk actions to mass delete information, or you can select Barcode Printing to select the items and print barcode labels with ease.
Work Centers > This section allows you to manage your work centers. Work center management is great because, within each warehouse, you can have multiple work centers. To add a work center select the Add Work Center button, give your work center a name, a code, and select the working hours by location (as set up within the Inventory section). Then you'll select the production information - Time efficiency (entered as a percentage), your Capacity, the Time before and after production (in minutes), the Cost per hour, set your targets, and provide a detailed description if desired. Then you'll save your work center. At any time you can view or edit your work center information. Also, within this work center section, you can export the work center data or manually search through the work center data.
Routing > The next tool within the manufacturing section is our routing section. Routing refers to when you manufacture a product and references what steps are required and who is involved. If you select the routing section, you'll see your routings which are your processes and if you hover your mouse over the routing you can view, edit or delete one at any time. If you select the view button, you'll be taken in to review your routing information, and you'll see the routing code, the routing name, the notes associated with it, and then you'll see the operations that are associated with your routing or process.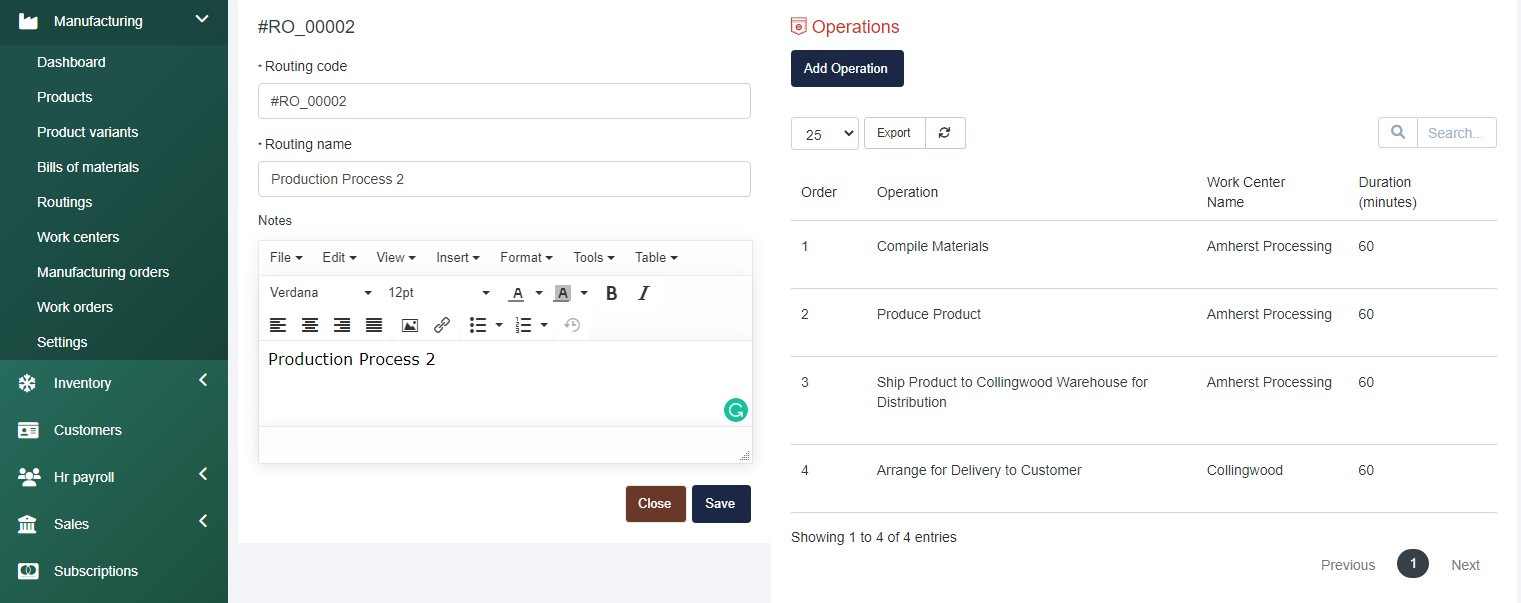
To add a routing, hit the Add button and then you'll add in the operation name, the work center that it occurs at, and you'll select the duration in minutes. Then you will select whether it's computed based on real-time or if you want to set the duration manually. You can set the duration manually in minutes or compute based on real-time, which means that it will be based on the number of work orders and hours associated with the work and manufacturing orders. Then you'll select the work center and you'll select when to start the next operation (once all products are processed or once some of the products are processed), and if you select “some of the products are processed” you'll have to select the quantity and the order which this will occur in and provide a detailed description. You can also attach any files as you see fit, and then you'll be able to save the data and select close to go back to your routing summary page. If any time you want to edit your routing, simply select the edit button that will appear when you hover over the routing name on the routing summary page.
Once you have all of your routing set up, you'll be able to see what employees have to do at each stage and understand how long your production processes take which will overall allow you to understand your labour costs and how that relates to the production of products and will be great for tracking shifts as having this setup allows you to figure out what shift is doing well, what shift is not, and look at ways into improving your productivity.
Bill of Materials > A Bill of Materials(BOM) or product structure is a list of the raw materials, sub-assemblies, intermediate assemblies, components, parts, and the quantities of each needed to manufacture an end product. A BMO may be used for communication between manufacturing partners or confined to a single manufacturing plant; you can use this as desired to meet your company's needs. Our bill of materials section is designed to provide your organization with complete control over the product structure by ensuring that engineering, production, purchasing, and order processing utilize the same information. The BMO section is defined by the manufacturing process and includes work centers, labour tools, dyes, inserts, fixtures, raw materials, packaging, scrap rates, set-up times yields and equipment. Within the bill of materials tab, you can easily view the existing bill of materials by selecting the view button that will appear when you hover over a BOM name.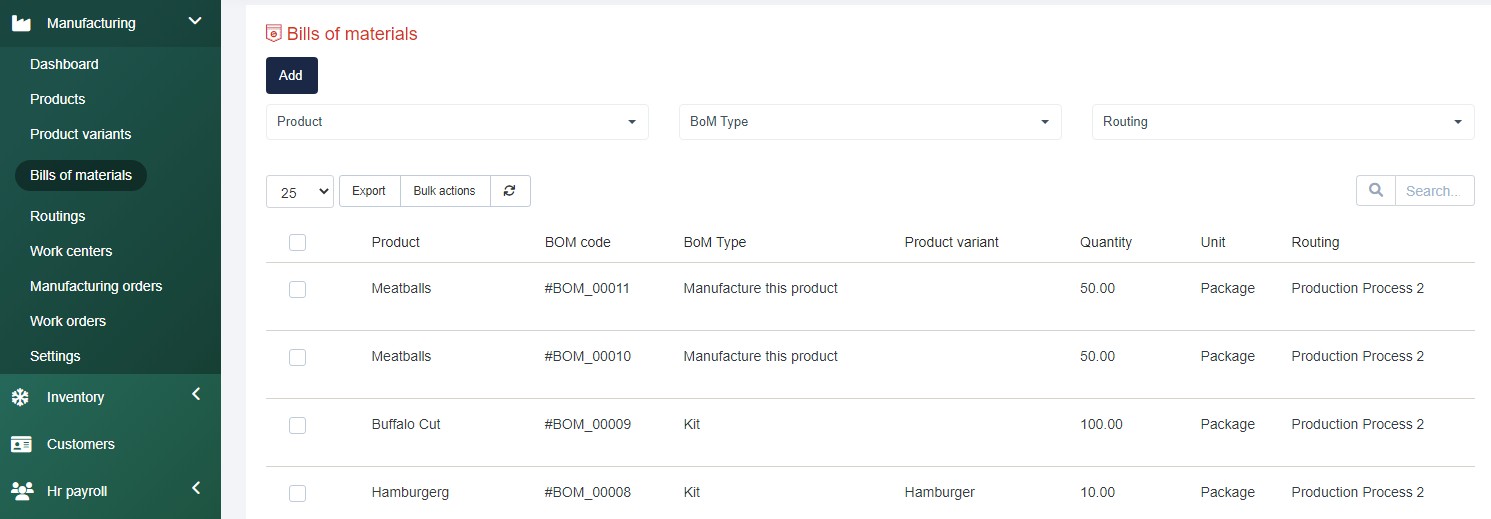
To create a BOM, you can select the Add button. From there the first thing you need to select is the product it is related to, and you can select a product variant if desired. Then you will enter the quantity, unit of measure, routing, BOM Ty[e (Manufacture this product or Kit), then fill in the miscellaneous information such as the manufacturing readiness, which can be when the components for the 1st operation are available or when all components are available, and if the consumption of the product is strict or flexible. Once your data is entered, make sure that you hit the Save button. Once you hit save, you will be taken into the BOM where you can select the Add button under components on the right of your screen. Once selected you can select the component, enter the quantity, and unit of measure, and select the variants to apply this to. Then select when the component will be consumed in operation and you can manually control the order it appears in or leave this as it populates. Then you will save this component and can add as many as desired to the BOM. When you're ready to go back to the screen, after you hit save, you can close the bill of materials to go back to the BOM summary page.
Within this section, you can export your data at any time as an Excel, CSV PDF, or print the data. If you do choose PDF, it will download the file and you will just have to click to open the file. If at any time you'd like to delete an existing bill of materials, you can hover over the BOM and select the delete option and after you confirm the action, the data is gone and it cannot be restored. If at any time you want to conduct bulk actions, you can select bulk actions and mass delete any content as desired, and then confirm the action. You can also search through your bill of materials at any time.
Bill of Materials flows directly to Manufacturing Orders which flow to Work orders.
Manufacturing Orders (MO) > The next tool within the manufacturing section is the manufacturing orders section. This section allows you to see all of your manufacturing orders and you can view, edit, or delete them at any time, export the data or conducted bulk actions like mass deleting them. You can filter this section by product routing or by status or you can search through the data at any time. 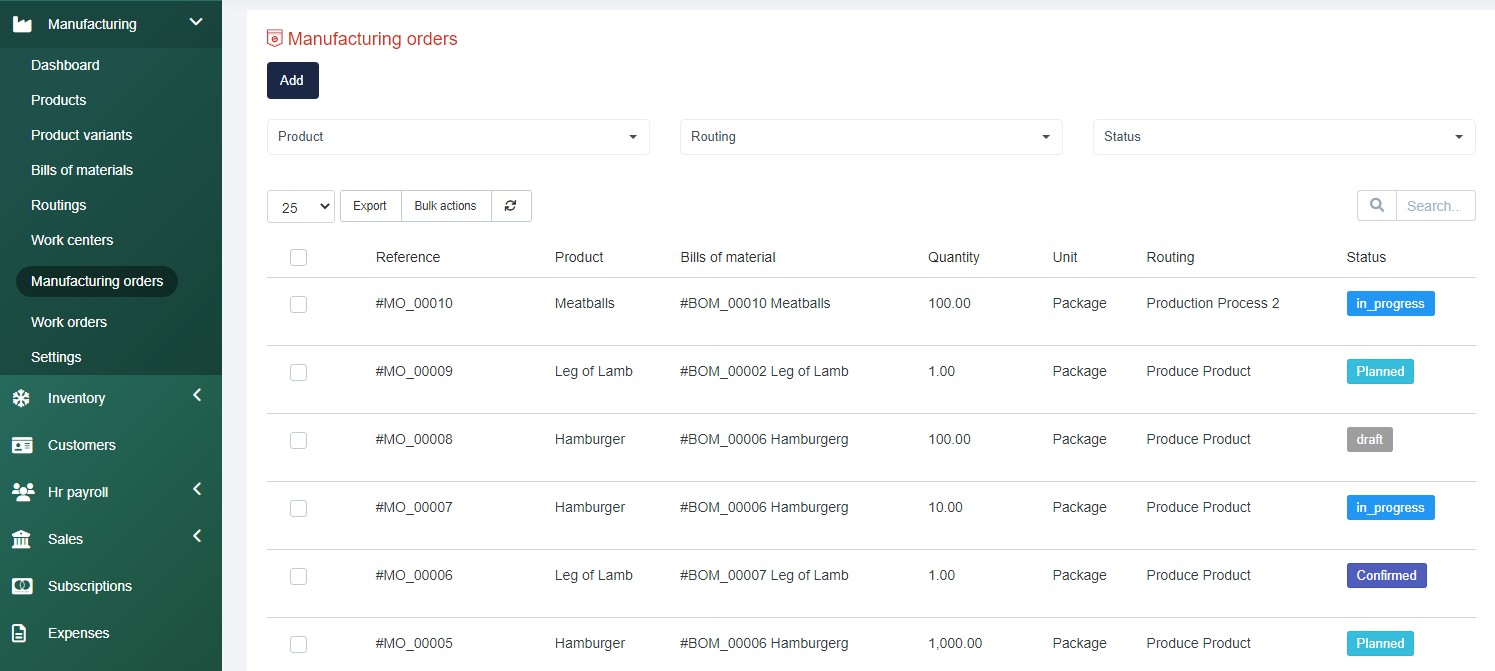
If you want to view the details, you can simply view the details by selecting the view button. If at any time you need to edit this manufacturing order, you can edit it. The manufacturing orders or the work order screens can be viewed on a tablet or an alternative screen to allow your staff to access the work instructions.
To create a Manufacturing Order, ensure your routings are set up appropriately, then navigate to Bill of Materials to ensure there is a BOM setup, then navigate to Manufacturing > Manufacturing Orders and select the Add button and populate the required information - product, quantity to produce, unit of measure to produce, select the associated BOM which will populate the production information, then select the deadline, plan from date, the staff member responsible, fill in the reserved category, and then Save your MO. From here you can select Mark as to do when you are ready for this MO to generate Work Orders (WO). 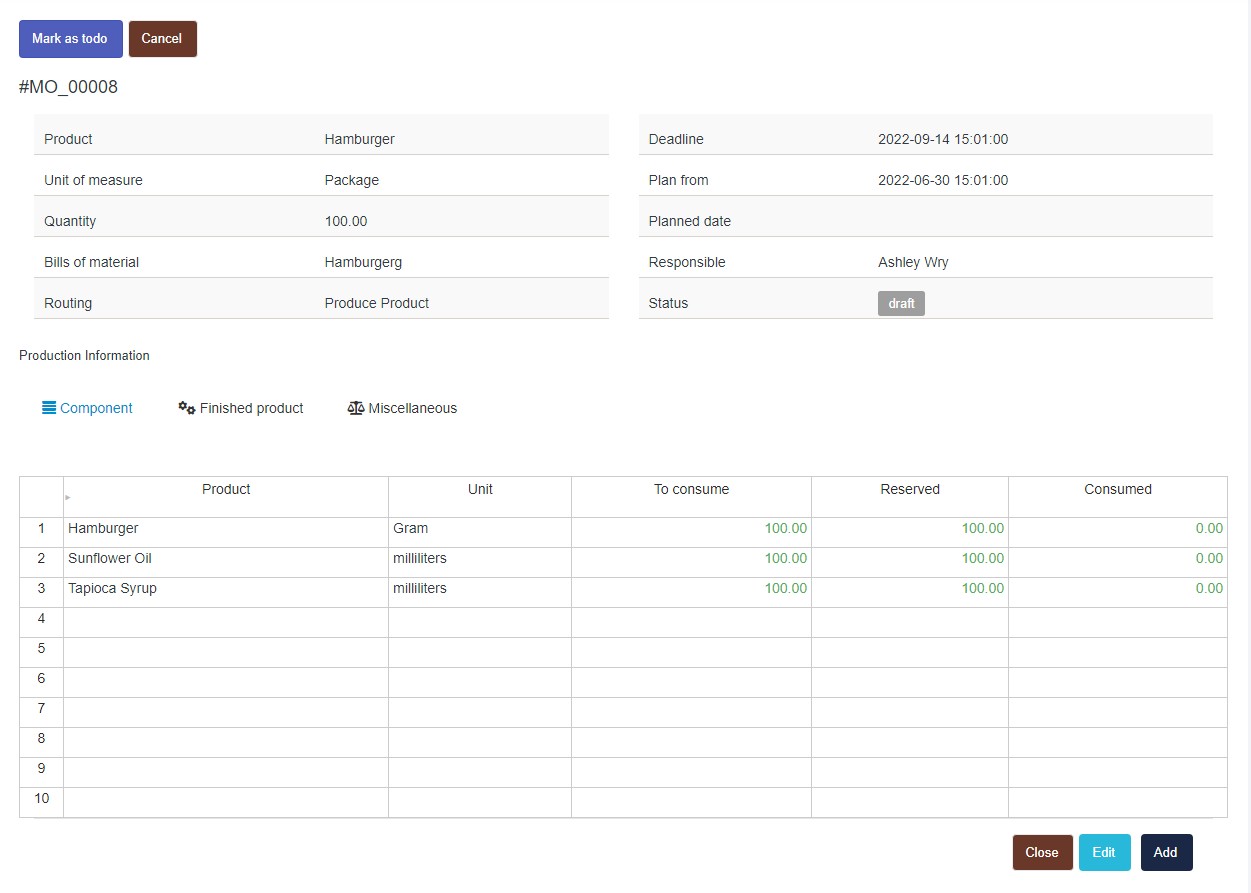
Once you mark a WO as to do you will see the Planned, Reversal, and Cancel buttons appear and you can select the planned button to generate the appropriate WOs. 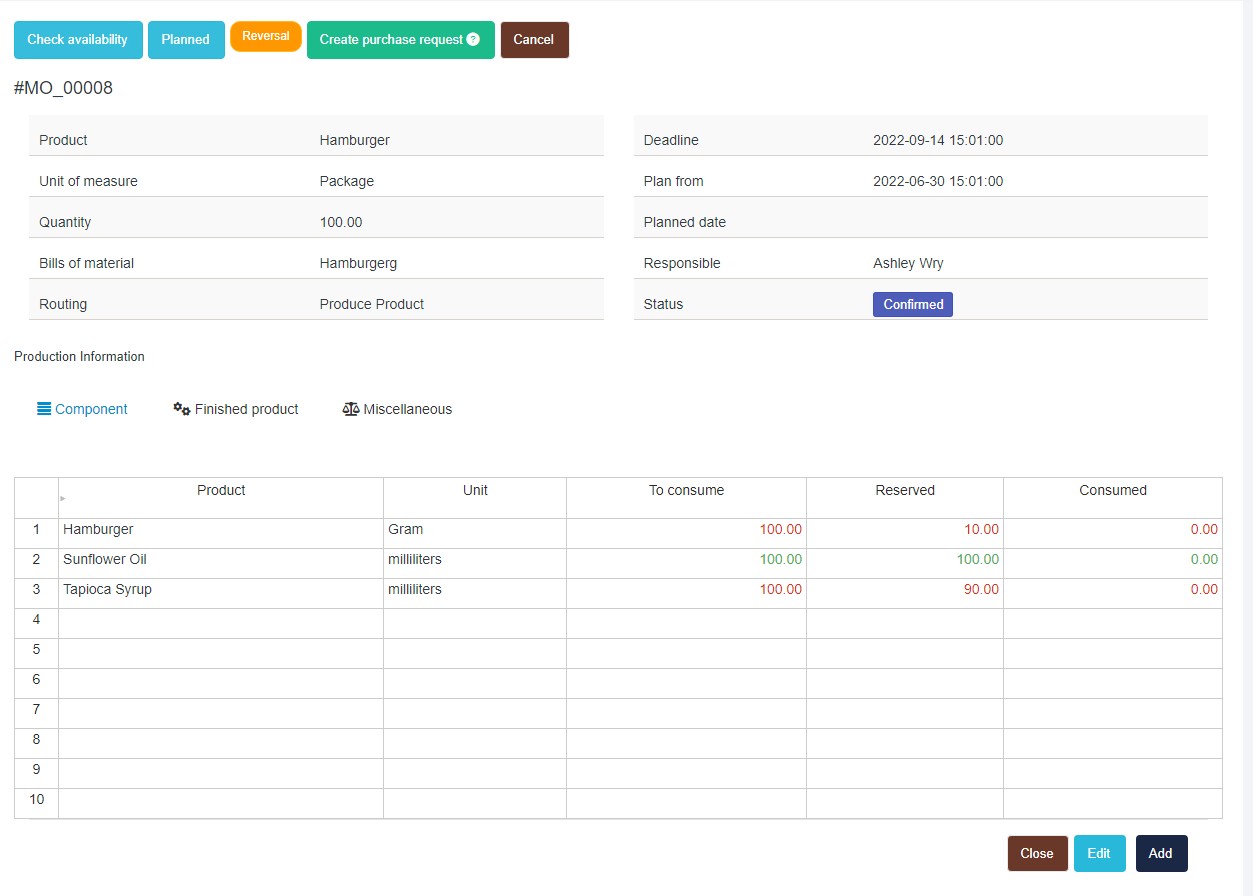
If you do not have enough inventory for an item it will ask you to check the availability of the item and if you do not have enough, select to create a PO on this page.
Then check availability when you have received the required items and ensure the stock is showing within the Inventory Items tab and the work orders will be generated based on the routings and BOM details associated with the MO.
Work Orders (WO)> Within the work orders tool, you can view, edit, or delete existing work orders, understand their scheduled start date, the work center they're happening and understand the manufacturing order it’s associated along with the product and the quantity in the units and see the WO status. Work orders flow from Manufacturing orders and the routing details you have set up. 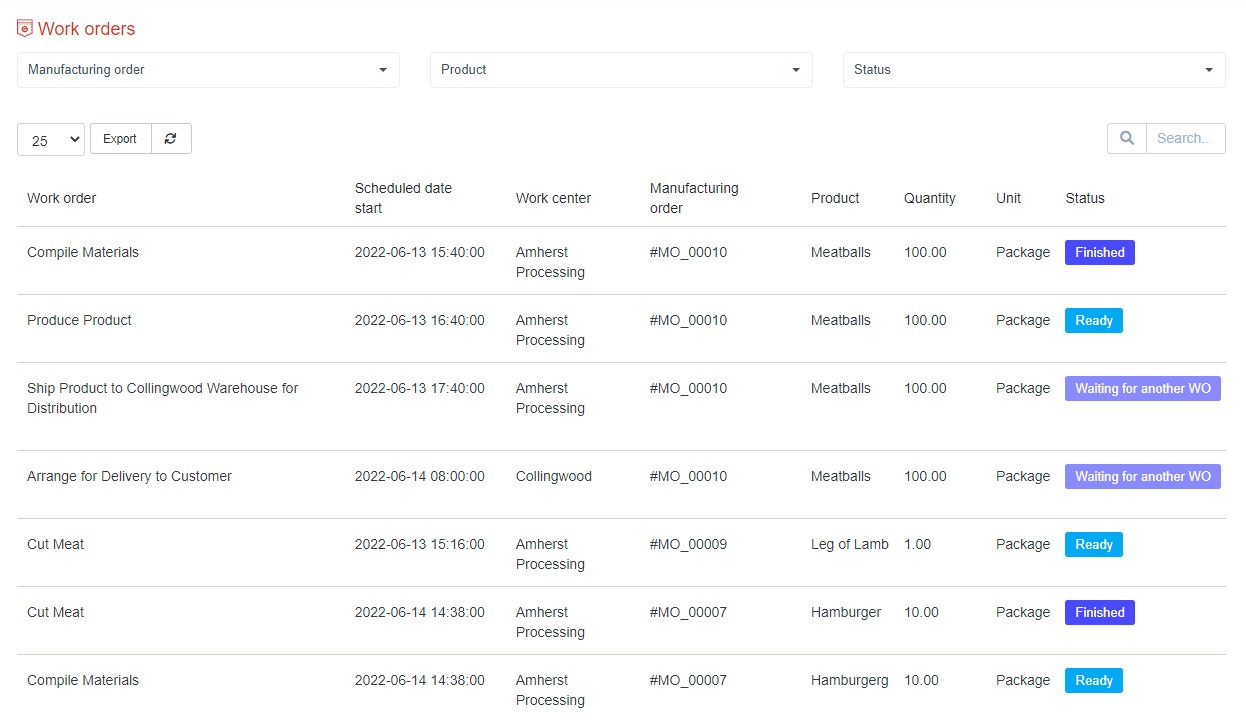
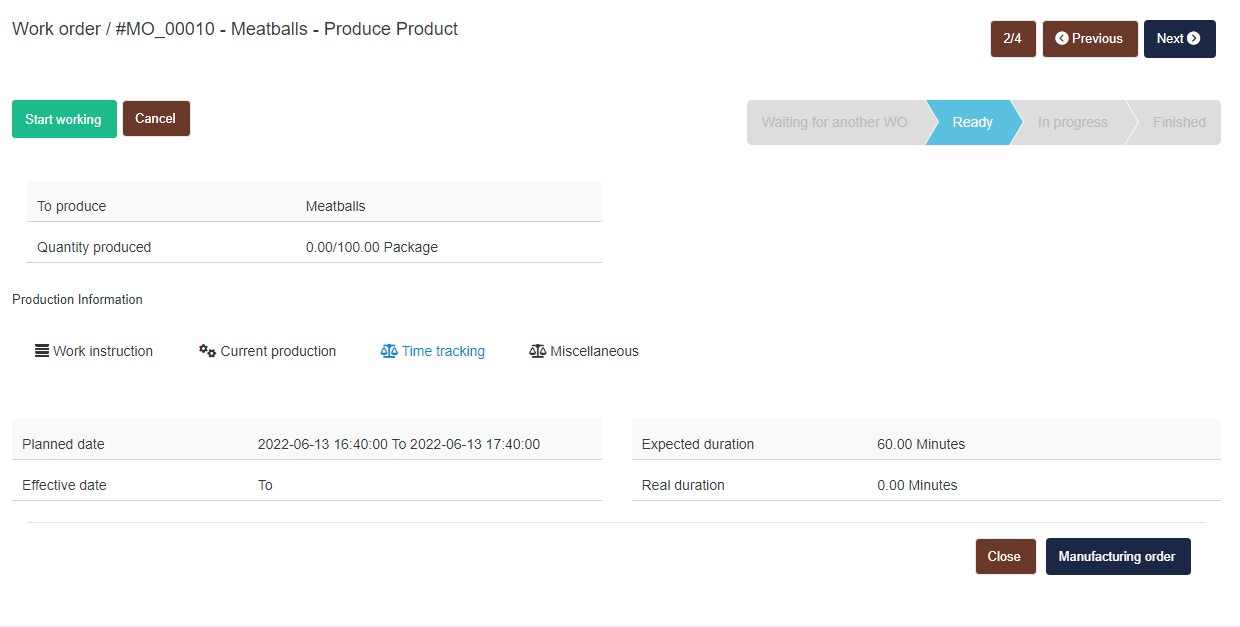
To view a WO, simply hover your mouse over the details and select view to see the work order, the work instructions, the current production, the time tracking to know what time has been logged against this, and when they started, when they ended, and you can also select into the miscellaneous tab to see the work centers and manufacturing order it is associated with.
Then your employees can access this Manufacturing > Work Orders tab and see a summary of all work orders ready to complete, and they can select their WO and access the work instructions, current production, and time tracking tab.
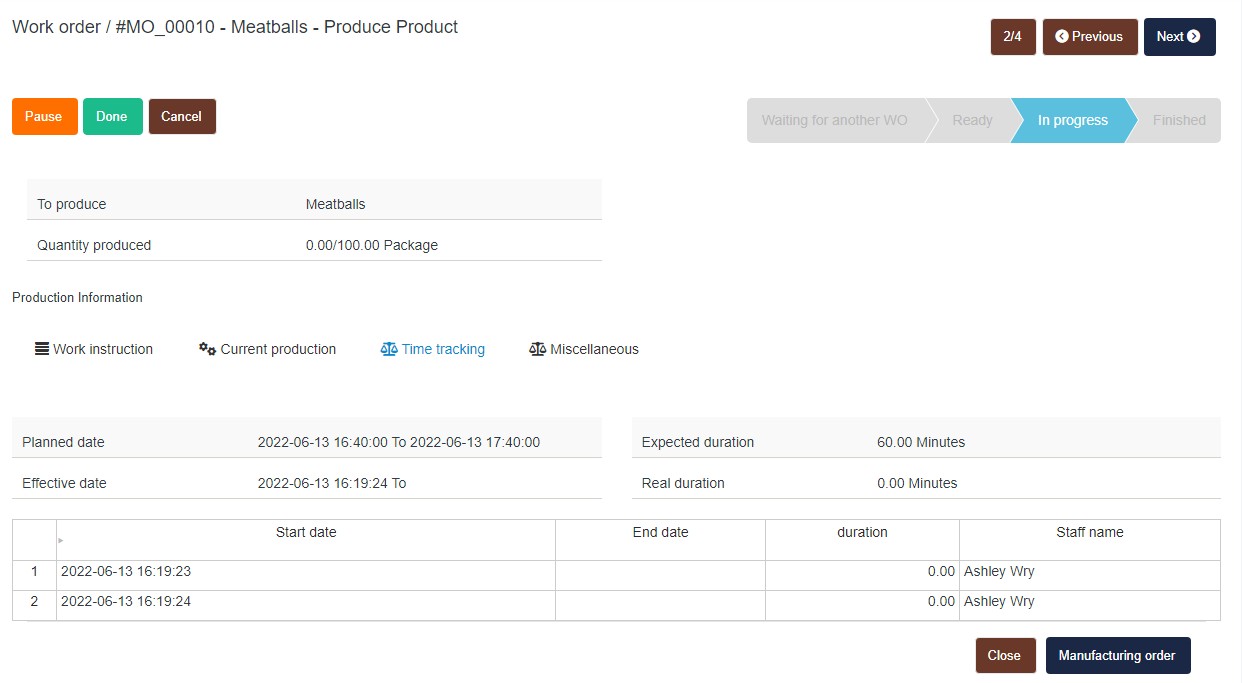
Within the Manufacturing Work Orders tab, in the work order under the Time Tracking tab users can use the Start Working button to start a timer and can pause the timer when not working, resume when ready and then mark the production as done to update the WO status to finish and provide you real-time analytics on what's done, how long it took, and who did it.