Located in the left navigation pane is the Projects tab for project management. This tab allows you to see any of your company’s public projects - a filter option is on this main screen to aid your search for a specific project that needs to be found quickly.
On the project summary page you will see all of the projects and you can edit, view, or delete projects. If you select into view a project, you will be taken into the project overview screen where you will see the key highlights of your ongoing project - total progress, open tasks, and the remaining time to complete the project. Within the overview you can see the members contributing to the project and their logged hours.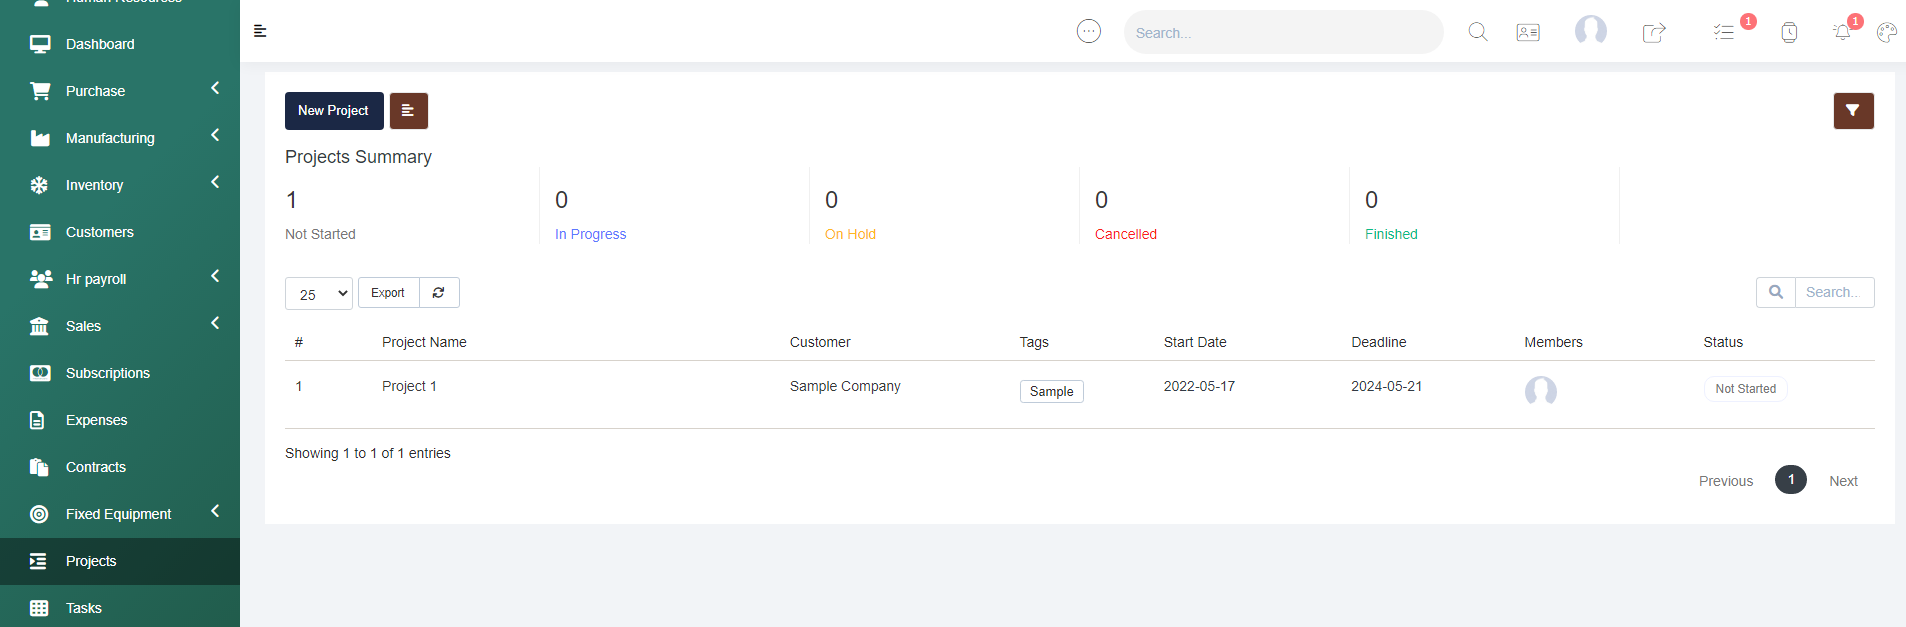
How To Create a New Project
Step 1 - Navigate to the Projects tab
Step 2 - Select the New Project button. 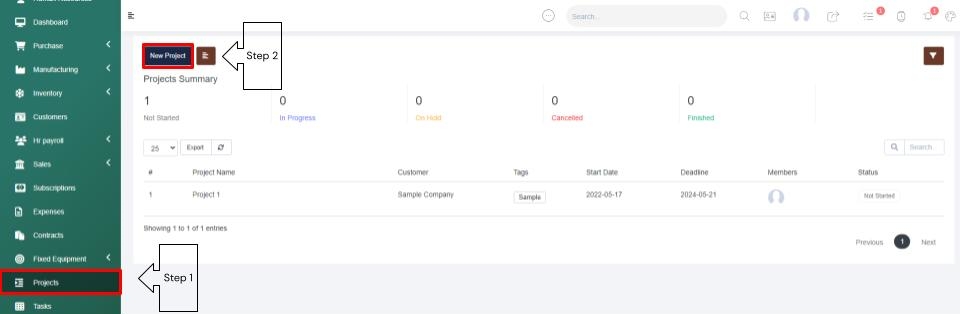
Step 3 - Populate the details- Give your project a name and enter your customers company name. Then you have the option to leave calculate progress through tasks selected, or you can unselect this option to manually manage your progress percentage. Then in the Billing Type dropdown, select a billing type (Fixed Rate, Project Hours, or Task Hours - based on a task hourly rate). Then select the project status, and enter the rate per hour if you chose Task hours as the billing type. Then you can enter in the projects estimated hours, and select the Members drop down to add in staff members. Then choose a start date. The deadline date is optional. Then you can tag the project as you see fit, enter in a project description, then choose to check or leave unchecked the Send Project Created Email option. 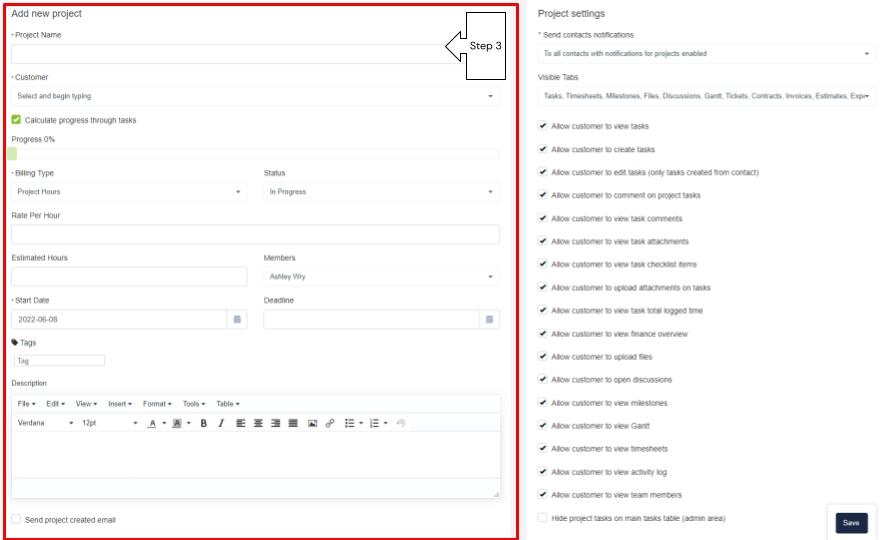
Step 4 - FIll in the Project Settings - located to the right of the New Project information you just added, is the Project Settings. First you can manage your project notification settings (Send to all contacts, Specific Contacts, or Do Not Send Notifications). Next you can select the Visible Tabs you will see within your project. Then you will manage the settings for your customers within their client portal
Step 5 - Save your Setup. Once saved you will be taken into your project where you can click through the tabs, set up project milestones, assign tasks, and manage all of your project related information. 
As Projects can be accessed by clients, if desired within the client portal, it is important you read through each of these settings to control what your customer will have access to. Then you can save your project set up and you will be taken into your new project.
Within this project you will have all of the visible tabs you selected. On the Overview tab you will see a summary of the project details, then you can easily add in milestones and tasks, manage contract details, collaborate with your clients using the discussions tab, manage project files, manage internal notes, manage timesheets, and easily access the activity log to understand all that has gone into a project. 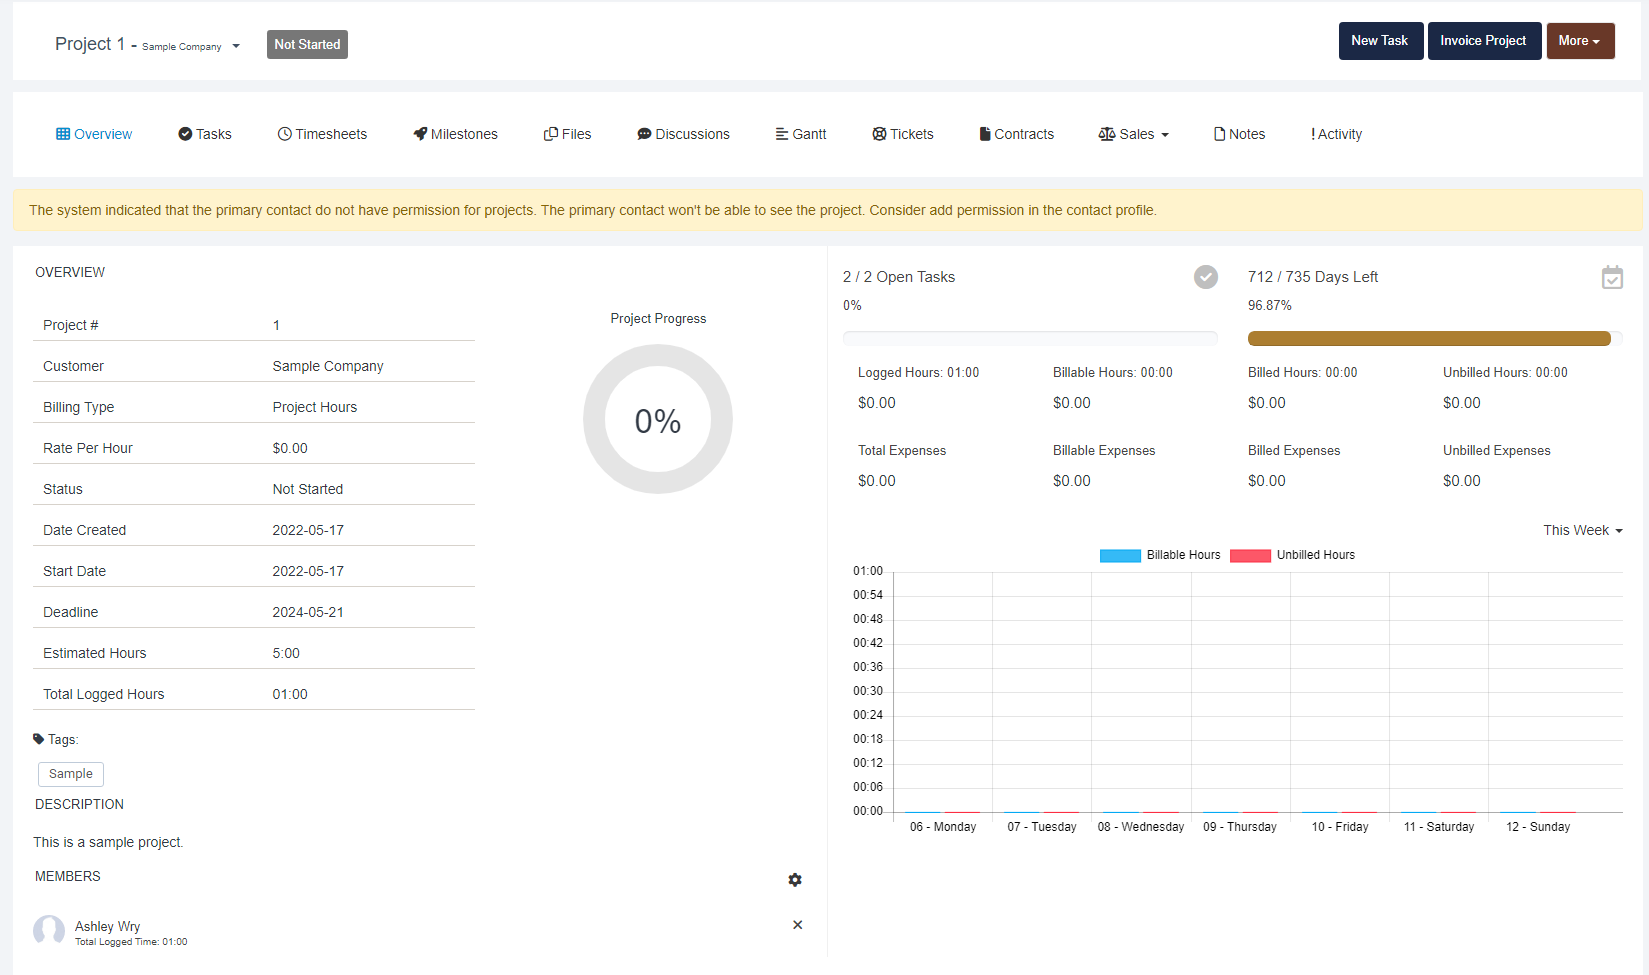
How to Create Project Milestones
Within the Projects tab, select your desired project, and select the Milestone tab.
To create a milestone, select the New Milestone button. 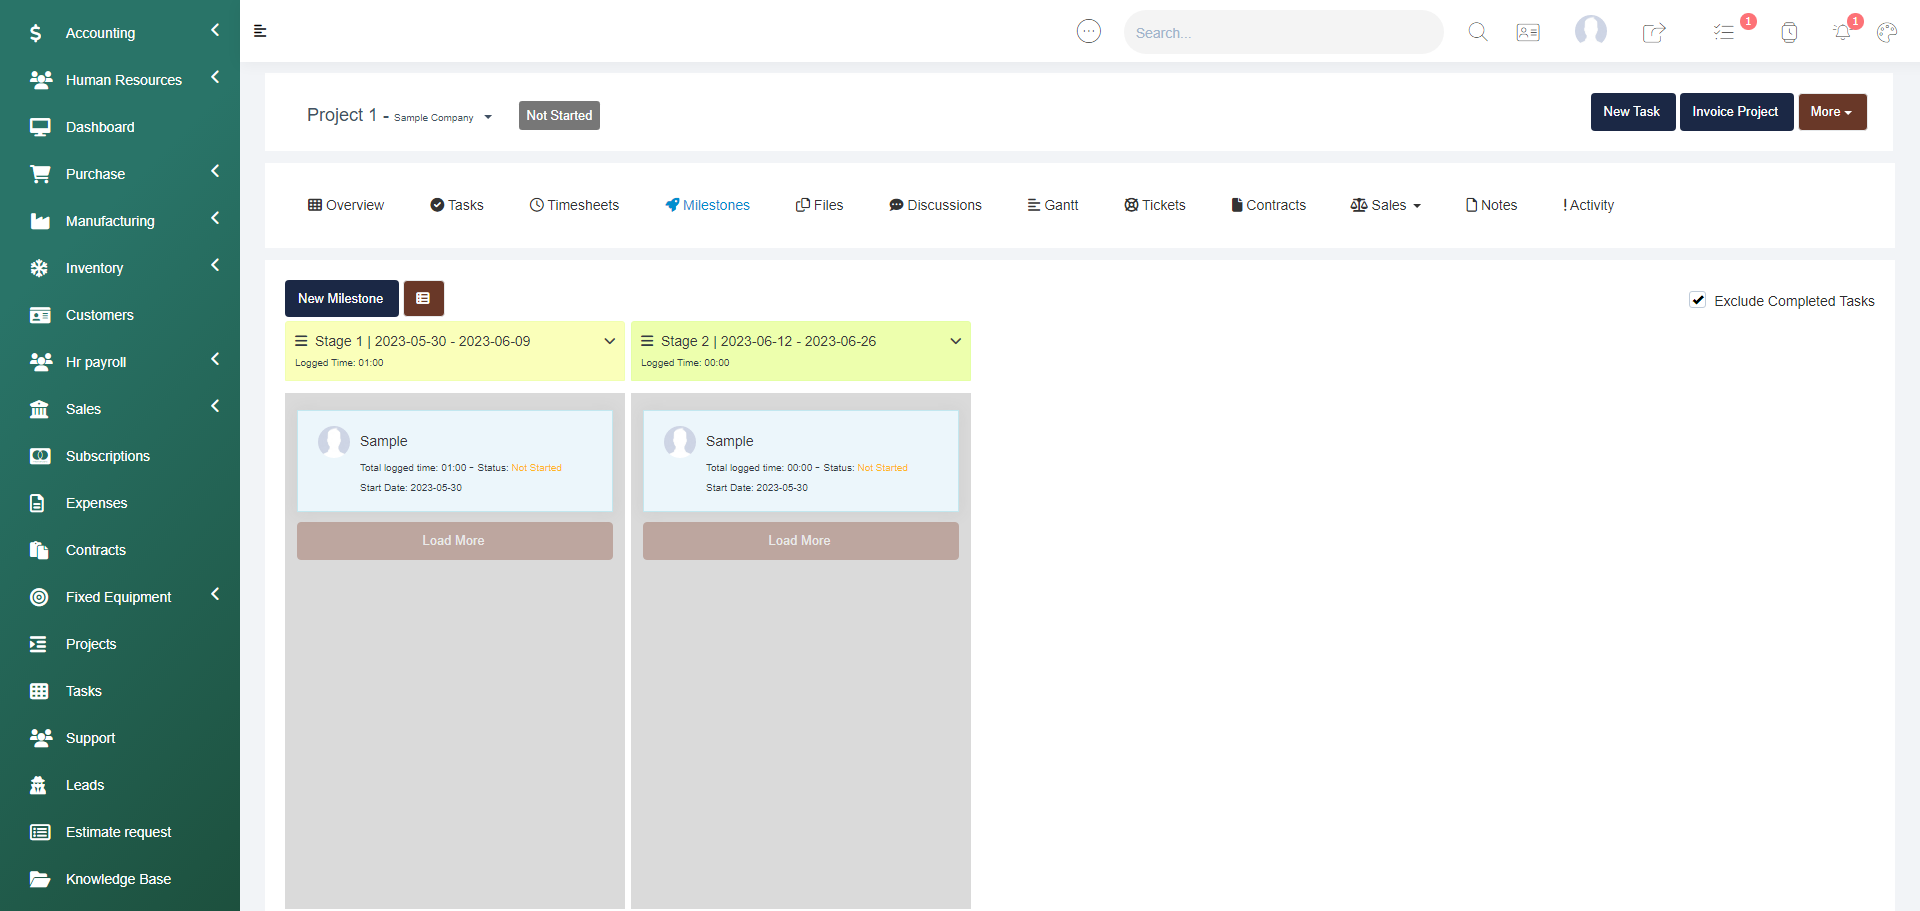
Then give your milestone a name (this will appear in view mode), then select a start date, a due date, provide a description, and select whether you want to show the description to the customer or not, or hide the milestone from the customer. Then you can control the order this appears in and Save the milestone. 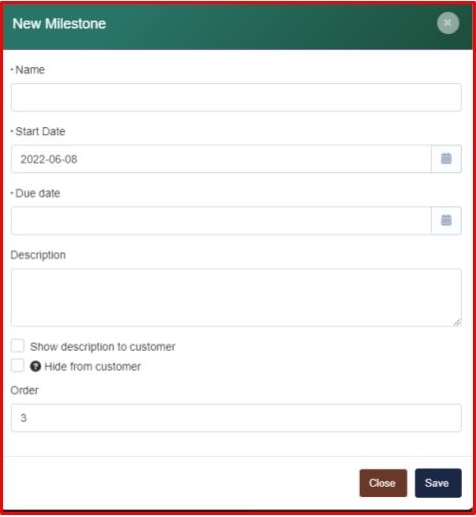
How to Create Project Tasks
Within the Projects tab, select your desired project, then select the New Task button located in the top right of your project screen. 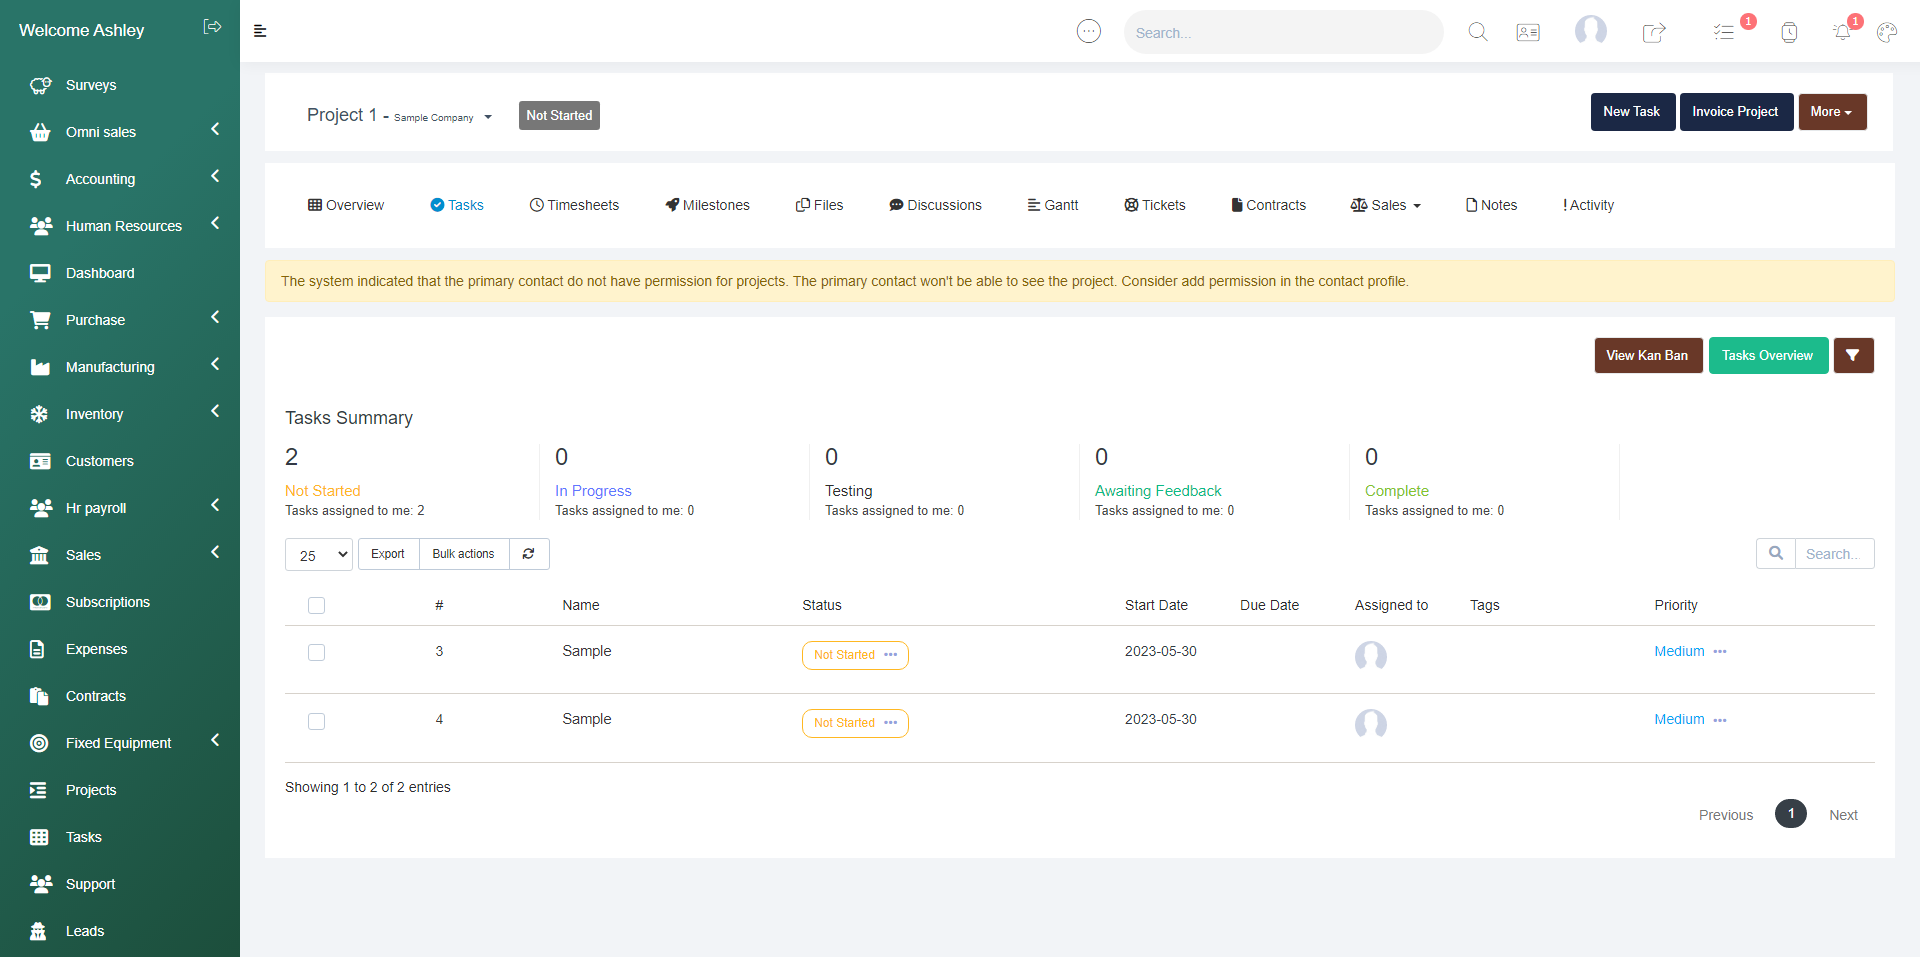
Then fill in the Task Details - Select whether the task is public or not, if the task is billable, or if the task will be visible to the customer, then you can attach any relevant files, give the task a name in the subject line (this will show in the visual mode), then select the milestone the task is related to, then select the start date, then due date if desired. Next you can control the Task priority and whether to repeat this task at a set frequency. The project task will automatically be related to the project you are working in. Then select the assignees and followers from your staff member list. Then you can tag the task if desired, provide a description, and Save the task. 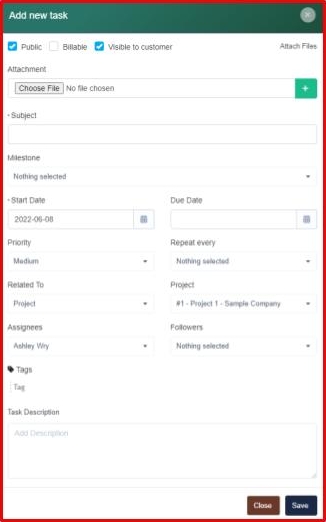
As you add milestones and tasks you will be able to view the data in a chart mode where you can drag and drop tasks to different milestones and edit details as you see fit with the edit option.
Activity Log
This log displays everything that has happened in association with the project, and allows you to select which actions will be viewable to the customer in their client portal if you provided access within the project settings.
Notes
This section is only accessible for you and your team so you can leave detailed project notes with ease.
Timesheets
Within the timesheets tab you can record your time working on a project by selecting the Timesheets button. From there you will enter the start and end time, select the project task the time was associated with, then select the staff member, leave any notes as desired then Save the timesheet.
Files
This section allows you to store all project-related files and within this section, you can choose to allow the files to be visible to the customer or not using the toggle bar. Then you can export the files, download the files, or mass delete any files using the bulk actions button.
Gantt
Within this tab you can view your project milestones and tasks in as a Gantt chart.
Contracts
This section allows you to manage project-related contracts.
Sales
This dropdown allows you to access all of your project-related Sales Invoices, Estimates, Expenses, Credit Notes, and Subscriptions.
Discussions
This section allows for internal communications or for external communications with the client using the client portal.
If you have any questions about managing your Projects section, navigate to the Enzebra Core - FAQs to search for answers to your questions with ease.