Our surveys tool allows you to send surveys to leads, customers, or staff members. Once you click into the surveys tab you will be taken to the surveys summary page. On this page you will see a summary of your surveys Name, Total Questions, Total Participants, Date Created, and if they are Active. If you want to close a survey, you can toggle the active toggle bar to grey. 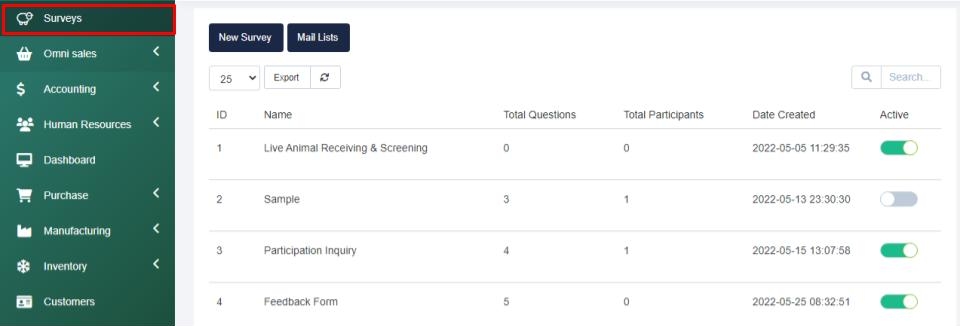
When you hover over a survey, you will see View Survey, Edit, or Delete. If the survey has results you will also see the option to View Results.
If you select View Survey you will see the survey like a participant would. If you select to Edit a survey you will be taken into the setup of the survey and be able to edit the content as you see fit. If you Delete a survey, the data cannot be restored. When you select View Results you will be able to see the responses to all of the surveys.
How To Create a Survey
Step 1 - Select the New Survey button, then you will be taken to the survey setup page where you will give your survey a title in the subject line, a short description which will appear on the survey, and then you will setup the email that will send to your participants in the email description section.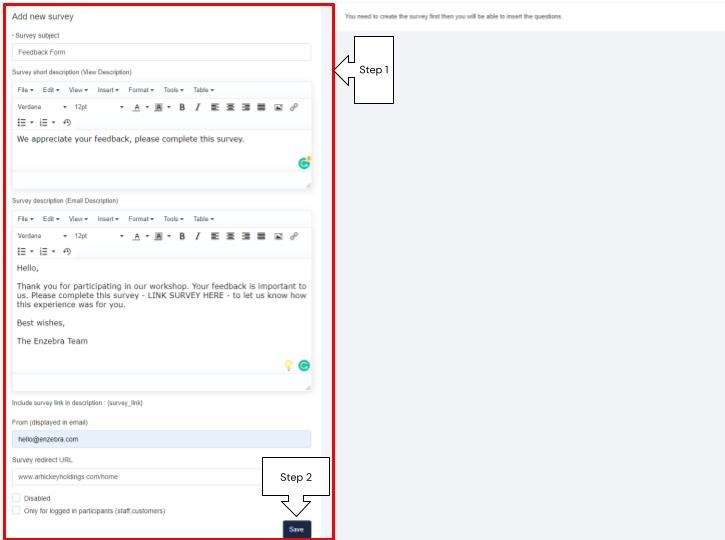
From there you will enter the "from" email that will be displayed in the email. Then you have the option to include a URL to a Calendly page or information page to automatically redirect your participants to after they submit the survey.
After that you will see two checkboxes - Diasbled and Only for logged in participants (Staff,Customers). Diabled is useful if the survey is in the development phase. Only for logged in participants is useful when you want to ensure this survey is not sent to leads.
Step 2 - Then you will have to save your survey information to begin adding in questions.
Adding Questions to Your Survey
After you save your survey information you will be able to see a questions page next to your survey information. This page has two tabs - Questions and Send Survey. 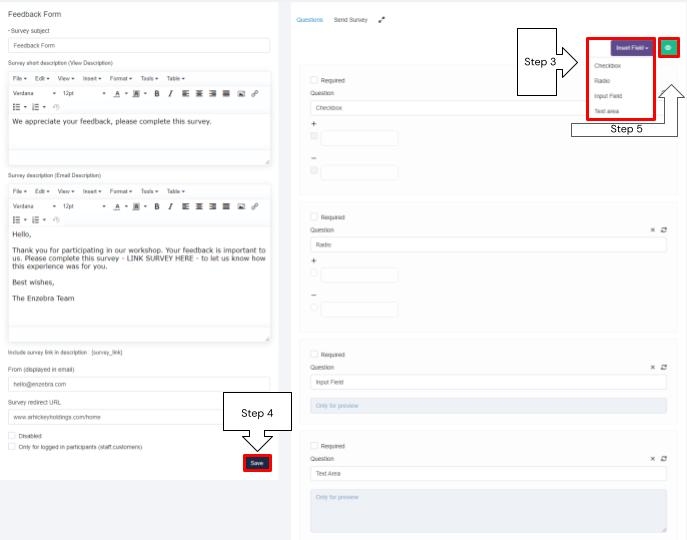
Step 3 - To add questions to the survey select the Insert Field button to see all of the options:
Checkbox & Radio - These fields allow you to type a question, then provide options for the responses that the participants can choose from. To add an option you simple hit the “+” sign. To remove an option, hit the “-” sign. You must provide at least one response.
Input Field - This field type is great for providing a question that requires a short response.
Text Area - This field type is great for responses to questions that require a detail or lengthy response.
For any type of question you add you can select the checkbox by required to make the question mandatory in order to submit. You can also delete an input field at anytime by selecting the x in the right corner of the question box.
Step 4 - Then save your updates.
How to View Your Survey Like a Participant
Step 5 - If you select the eye icon beside the Input Field button, you will be able to view the survey like a participant will view it.
If you enter into the edit mode on an existing survey, you will see a chart button beside the eye icon next to the Input Field button. This button will allow you to quickly view the survey results.
When designing a survey, you can drag and drop questions to rearrange their order or you can select the icon with two arrows pointing opposite ways to hide the survey setup and manage the questions on the whole screen Then Save any changes you make.
Quick Tip: Make sure to view your survey, copy the link, and paste the link into the survey email description to ensure when it is sent, people can complete the survey.
Step 6 - Send the survey - When you select the Send Survey tab you will see checkbox options - Customers, Leads, and Staff. If you selected Only for logged-in participants (staff, customers) you will not see leads as an option.
To send the survey to specific leads you will have to set up a custom status to categorize the leads within and then send it to the leads with that status.
To send the survey to specific customers you will have to set up custom customer groups to categorize the customers and then send the survey to the customer group.
If you select Customers - you can send it to all customers or select a customer group to send the survey to.
If you select Leads - you can send the survey to all leads, or select a specific lead status to send the survey to.
If you select staff, you will send the survey to all staff members.
If desired you can select multiple options (Customers, Leads, and Staff) to send the survey efficiently. Once you select who you are sending the survey to, you have to hit Send.
If you have any questions about managing your surveys, navigate to the Enzebra Core - FAQs to search for answers to your questions with ease.